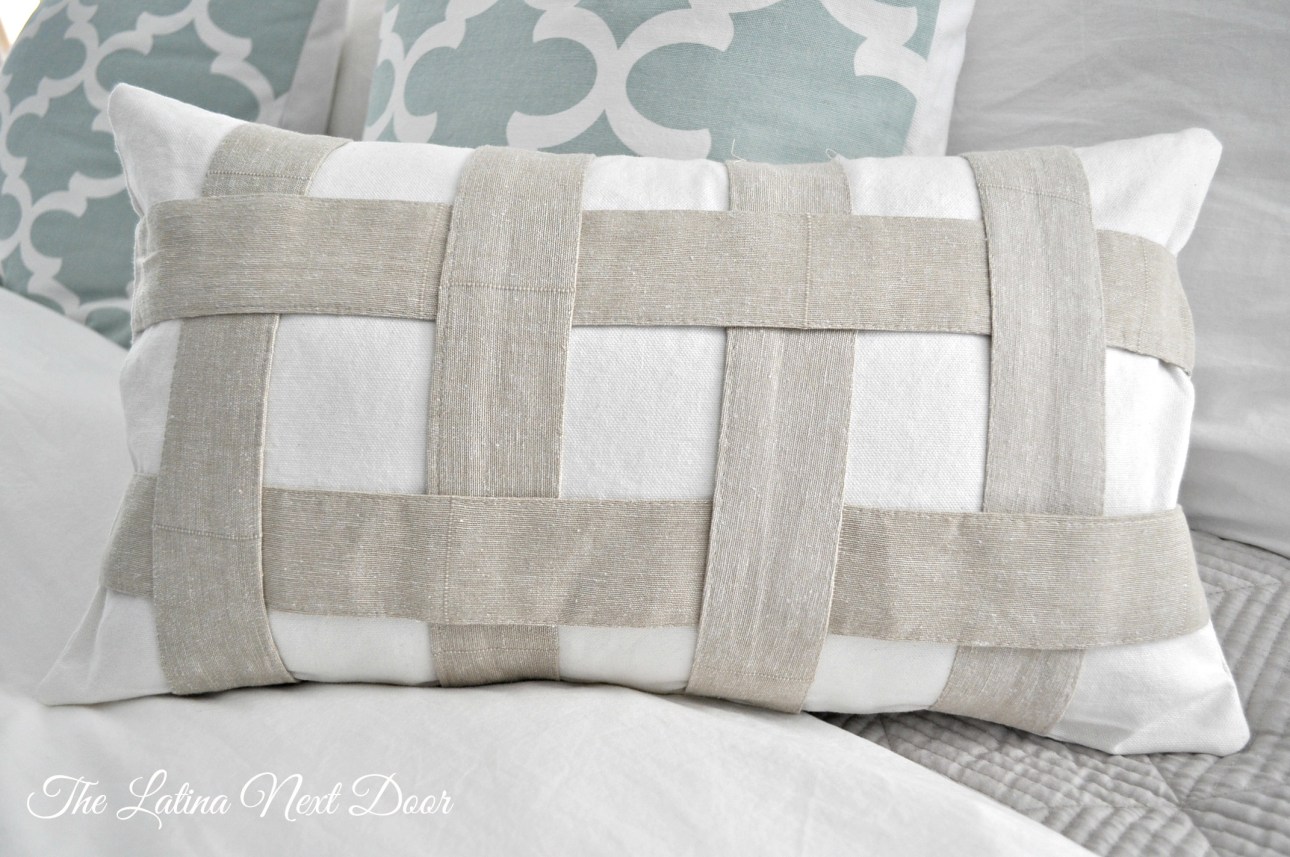
Repurpose those unused curtain tie-backs
So, I’m a girl who likes a nice pair of curtains or drapes, however, I NEVER use the tie-backs that usually come with. I mean, who does anymore, right? This then leaves me with pieces of fabric in my fabric junk drawer that just seem to take up space.
Confession. I’m a bit of a hoarder (so my husband says). Well, simply put I just don’t like disposing of things that might one day, maybe, just might, probably never really have a use for. One of the things I’m really trying to do this year is SCALE back. I have already made my first trip to my local Goodwill in order to get rid of some stuff that I really hadn’t used since we, ahem, moved in…. oops! Truthfully, I already feel better
Up next, kids playroom, but that is a post for another day.
Back to this post!
Over the weekend I made this beauty….(drool)…. with, none other than, you guessed it…. tie-back rejects…. So here is how it went down.
 I was looking through my junk fabric box and came across these little guys. I had 4….

They came from these drapes I showed off in my dining room reveal (the curtains look yellow below because of the light shining in, but the true color of the fabric is best shown in the picture above).
I considered throwing them out, when, I realized I had some leftover white denim fabric from my dining room chair covers (also pictured above). And then, this is when the epiphany came in and my little DIY brain turned on, my eyes lit, and I got goosebumps all over… okay, no goosebumps… well maybe a few.
I remembered I had purchased a down pillow insert at my local Goodwill, from POTTERY BARN no less, for only $2.69, oh yeah! I had it hoarded stored in my office also.
The wheels in my head went round and round……
DIY cushion here I come!
Ok, I’ll stop now. Here is what I came up with. First I took off the extra tabs with this snazzy tool.
Then, I measured the pillow. It was 12″x 20″, so I cut my fabric into 3 pieces. One 21″ in length x 13″ wide, and 2 pieces 14″length x 13″ wide.
I cut 2 of the tie-backs in half to get 6 pieces total, and I pinned them on the longer piece of fabric in a basket weave pattern. See below.
Once I got them placed just right, I sewed the tie-backs on and cut off the excess.
I laid the other pieces of fabric right on top.
Make sure to sew the middle ends of the fabric since these will be exposed and will be where you insert your cushion. These two pieces will overlap which is what you want. Put the “prettier” one underneath since it is the one that will show on top when you flip your cover right side out.
Make sure to have all the “outer” fabric face the inside before you start sewing.
Then simply sew all four sides shut.
Finally, flip the cover right side out. I left the tie-backs loose on the cover (except for the ends) since I thought it would give it more interest.
This is what the back looks like.
Then stuff your cushion inside and viola!
As you can see you don’t have to be an expert sewer, cause I’m sure as heck not! But that is one sexy cushion if I do say so myself. I’m quite proud of this one. And it cost me $0.00, yes, ZERO dollars! NADA! Woot woot! Good thing I’m a hoarder saver.
Now, I am itching to do more “cleaning” just so I can create another totally awesome conversation piece for my home.
I would love to know if you have transformed any items in your home into something totally different from what it was originally. What do you think about this idea? Does it make you want to get some tie-backs? I wish I had more. Wait, I think I do!!!!!
I hope I inspired you to look at your “leftover” items a little differently.
Your Latina,
Yami
Like this project? Check out other DIY projects on DIY Like a Boss Link Party #4
andthe Pretty Project Party.


I love this, fabulous!
Thank you for your feedback Ivory! I am glad you enjoyed the up-cycle.
Thank you! I am so glad you liked the up-cycle. To this day, it’s one of my favorite transformations.