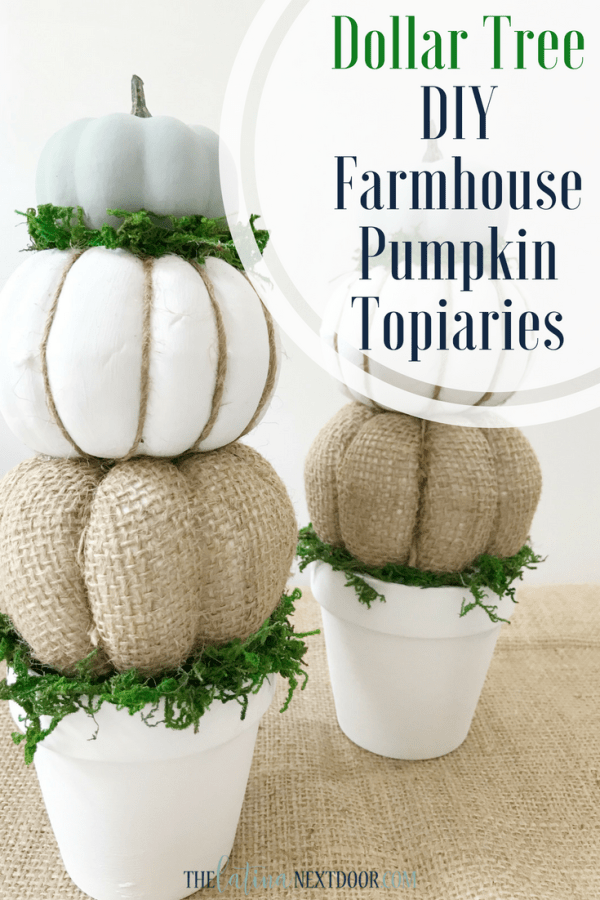
DIY Farmhouse Pumpkin Topiaries
*Some of the links below are affiliate links, for full disclosure please go here*
Yesterday morning I woke up to a little bit cooler weather and I cannot say how excited I was… I’m sure it will go back up to hot summer temps in a couple of days, but the cooler morning breeze was so nice to get out to.
With that we are all getting ready to decorate for fall and enjoy those long awaited holidays we all love to celebrate.
I decided to get a head start and start creating some neutral fall decor for the house…. of course, sticking to a tight budget.
You know I love Dollar Tree (and even decorated an entire Thanksgiving tablescape last year with their items), so I was so excited because their decor just keeps getting better and better every year. I decided to create these cute little neutral DIY farmhouse pumpkin topiaries with some of their new fall decor and some items I had left over in my craft room.
Each one cost me less than $3 to make and they were so easy…
Here is what you will need:
- Dollar Tree pumpkins in 3 different sizes
- Dollar Tree terra-cotta pots
- Paint of choice, I love this chalk paint for projects like this
- Twine
- Moss
- Glue gun
I had this chalk paint leftover from my Look for Less DIY Pottery Barn mirror DUPE and a sample I purchased months ago.
As always you can view the tutorial below:
I painted the pots in the white chalk paint, making sure to paint the rims and then hot-glued the moss on the edges.
I removed the stems and tags from the 2 larger pumpkins.
I didn’t like the yellow tone of the white pumpkins so I painted them with the same white chalk paint and then I painted the small pumpkins as well. I made sure to apply at least 2 coats.
When all were dry I was ready to assemble my topiary. I started with the largest pumpkin…
Then before adding the white pumpkin I added some twine to give it more texture.
I then hot-glued it to the large pumpkin.
After that I glued the smallest pumpkin.
RELATED: DIY Buffalo Check Mini Display Stand for Fall
And then I added more moss to cover the gap between the white and blue pumpkin and also to tie it all together.
And that was it! I decided to create 2 topiaries since they were so inexpensive and I just love how they turned out.
They are about 10.5″ in height so they are perfect for placing on an entry table of coffee table or even on some shelves. Plus, the best thing about them is that you can make them in any color?
Which colors do you prefer for Fall? Are you going traditional or changing it up this year?
I would love to hear what you think about these little topiaries!


Do you have a you tube channel or facebook page
Yes I do, you can find me at http://www.facebook.com/thelatinanextdoor or http://www.youtube.com/c/thelatinanextdoor – thank you for asking!
I love the subtle colors on these, not to mention incredibly budget friendly! I love the grayish- blue that was used on the small pumpkin. Thanks Yami.
Thank you so much! I am so glad you enjoyed this. I will be adding more neutral fall decor and sharing very soon!
Hi Yami, I have to share that I fell into the rabbit hole of diy fall decor and this decor piece was still my favorite and I finally decided to just do them! They’re not perfect but I honestly love them. Gracias for sharing!
What color did you use for the smallest pumpkin? I love it!
It was a sample chalk paint that I had mailed to me and decided to use for these pumpkins – unfortunately it’s not something that is sold in stores, but I am sure you can find similar acrylic paints by Folkart that would look just as amazing. I hope that helps!
Love this idea! I am going to have to hit the dollar store this weekend! Thanks for sharing!
I am so glad you liked this! These were so fun to make. Enjoy!
Hi Yami,
These are beautiful ?. What size pots did you use?
Thanks!
Thank you! These were the mini ones from Dollar Tree if I remember correctly.