DIY Lit Birch Wreath – Pottery Barn Dupe
Welcome to Day 1 of the Fourth Annual 12 Days of Christmas Series!

We have teamed up with 50 plus bloggers to bring you a oodles of DIY Ideas and Recipes to make your holiday season merrier. There are 12 different posts in the series and we have spread them out over a four week period with three posts per week. Now is the time to subscribe!
GO HERE for the complete list of Dates and Topics plus a collection of most popular holiday ideas including ornaments, games, recipes and more from all 50 plus talented bloggers!
It’s Day 1 and we are sharing DIY Wreath Ideas!
DIY Lit Birch Wreath – Pottery Barn Dupe
For my DIY Wreath, I decided to do something totally different and out of my comfort zone, because I figured everyone would be expecting a traditional Christmas wreath. I saw this amazing looking lit birch wreath on Pottery Barn’s site.
Yeah, it was pretty but too expensive so I decided to recreate it myself.
And don’t forget you can always see a video tutorial of this project on my YouTube channel.
I had this foam wreath from Dollar Tree in my craft stash…
I painted it with a tan acrylic paint I had on hand.
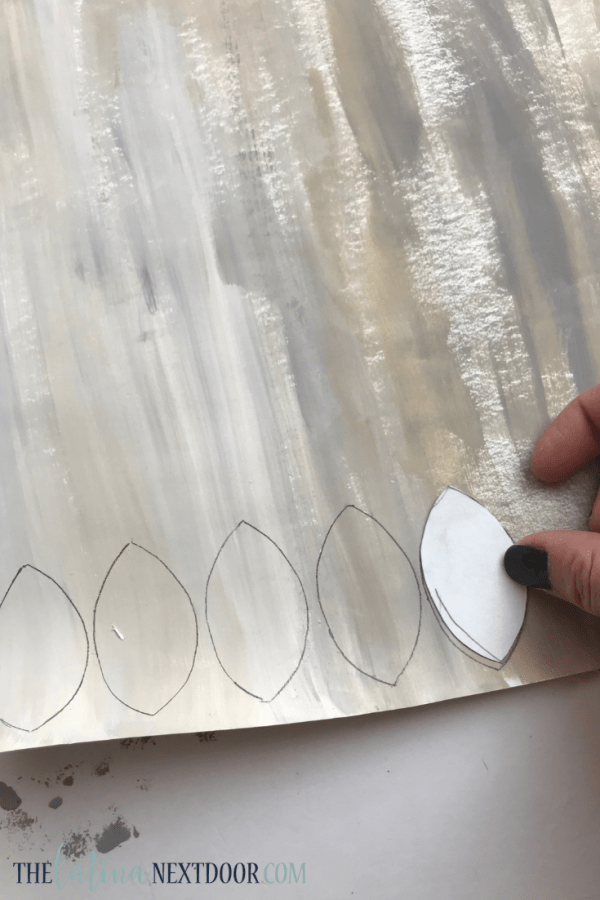
I decided to use some “faux” wood scrapbook paper from Hobby Lobby, but since it was one-sided I had to paint the other side. And I just brushed on that tan acrylic paint along with some great and white. I just used long streaks and alternated the colors.
Below you can see what both sides looked like.
Okay so after the paint dried, I created a leaf template from poster board and I traced it on the paper and began to cut the small leaves. I used 3 sheets total for this 10 inch wreath…
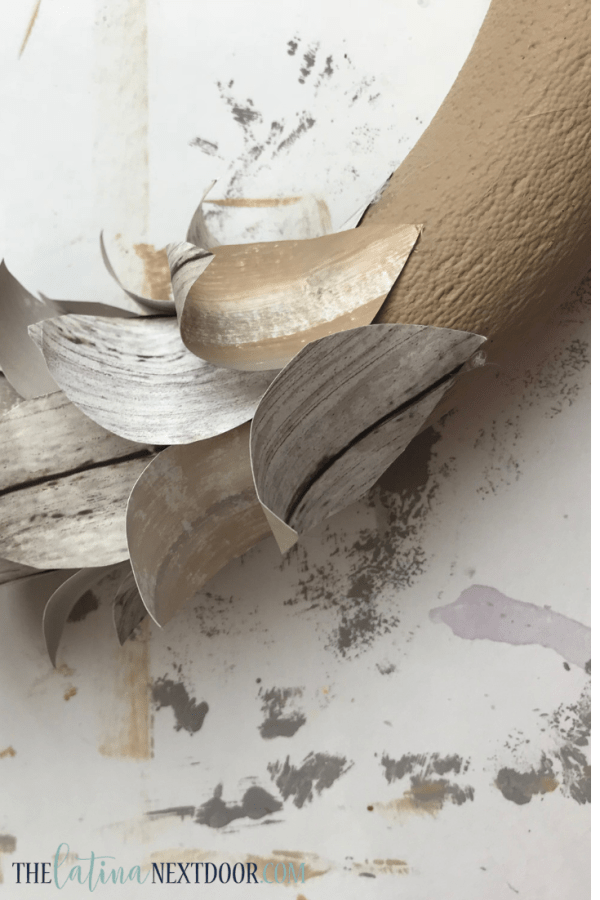
After they were all cut, I used a hot glue stick (not hot of course) to create a curve on the leaves.
Then I began hot-gluing them to the wreath. I made sure to place both front and backs of the paper randomly and I also did not add any leaves on the back so that it would lay flat up against the wall.
This is what the wreath looked like after it had all the leaves on it.
Then since the original had glitter on it I mixed some gold and silver from my stash (gotta love that stash!) and added to it randomly as well.
I decided to also dry-brush some gold acrylic paint throughout it as well. The best brush to use for this is a fan brush.
Then finally, I sprayed it with some spray adhesive so that the glitter wouldn’t keep going everywhere.
I think I still have glitter on me ?
And voila! I had my own “birch” wreath!
I added the same kind of fairy lights that I used for my farmhouse floral sconces and it works great!
Whatcha think? I know it’s different, but I am so glad I tried it! The original cost $129 and mine only cost $3.25! Can’t beat that.
If you liked it too, please pin and share with your friends!
I will see you guys Wednesday!
Scroll down for many more DIY Wreath Ideas for your holiday season!


Ok Yami this turned out fabulous! I can’t believe its just scrapbook paper that is amazing!
Wow, I really love this! Not only do I love the look, but that you used stuff you already had on hand. #12DaysofChristmas2018
Oh that is gorgeous! It’s so cool how you made it.
I LOVE this!!! What a great job in duplicating the wreath…it turned out perfect!!! And the cost…..Perfect!! Thank you for sharing your talents!
Thank you so much! So happy liked this!